

How-to: Jeep prep, removing the seats, pre-measures, etc
Step 1. Remove the back seats and cover for the original equipment jack stand and storage compartment. Removing seats for the first time can be a major pain, but once you break the Loctite it’s a breeze. Get yourself a long lever or proper breaker bar to put over your wrench/socket handle to give you some leverage.
 These bolts suck—impact wrench for the win
Step 2. Using the general measures from all of these DIY instructions and images, grab a tape measure and detail on a sheet of paper and detail what your specific bed measures need to be. Keep in mind window cranks, center consoles, extra speakers, seat positions, etc.
Step 3. Using the 48″ T-square, transfer your measures to large pieces of cardboard to use for templates. Even if your Jeep Wrangler JKU make and model match my 2015, I suggest doing cardboard cutouts so you can “see” how things will fit before building!
Once you cut templates out you can add too or take away material to get your fits just right. My final pieces looked like a cardboard Frankenstein’s monster because I had cut and added to them.
How-to: The Jeep Bed Spine & Bed Supports
Step 4. Measure and confirm the size and placement of the spine support of your Jeep bed platform. Don’t worry, you’ll confirm things next without cutting much.
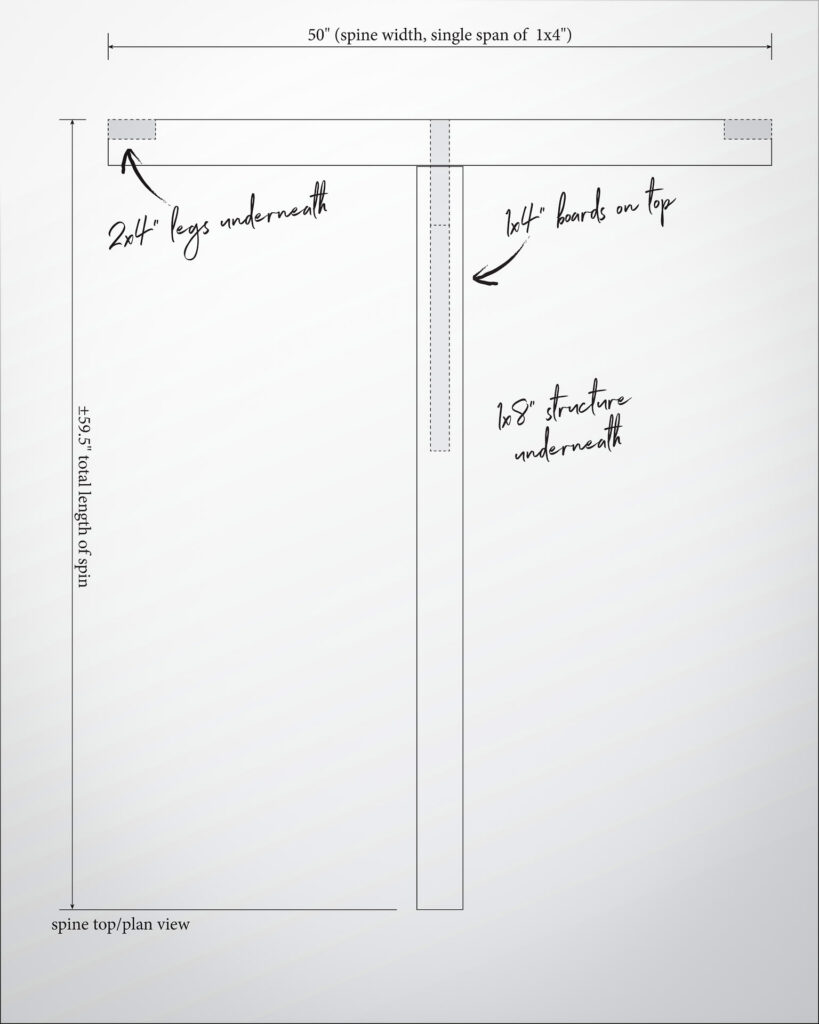 The “spine” details of the Jeep Wrangler JKU bed platform with measures, top view
 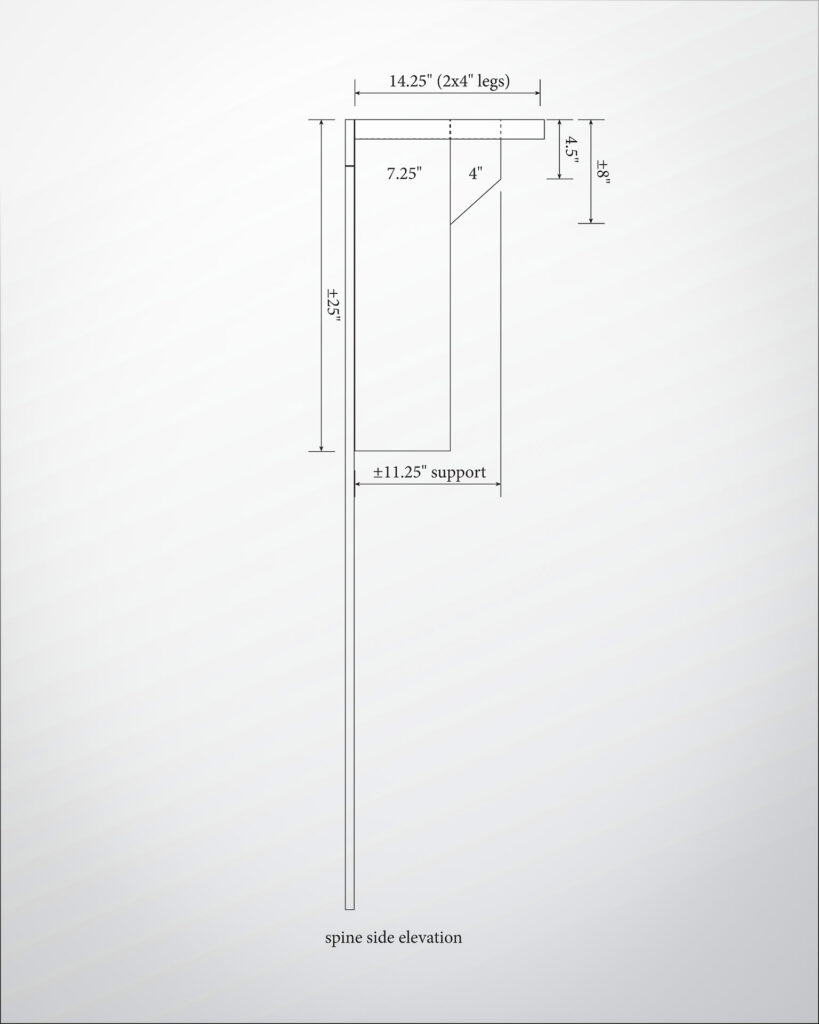 The “spine” details of the Jeep Wrangler JKU bed platform with measures, side view
Step 5. Soft-assemble to confirm size, height, etc., that will give you other measures. Cut your 2″x4″ spine legs and simply place in the jeep and set on of the 1″x4″ boards extending out the doors if you want, until you confirm measures. You can then place the other 1″x4″ on top going out the back of the jeep and simply prop that up to height.
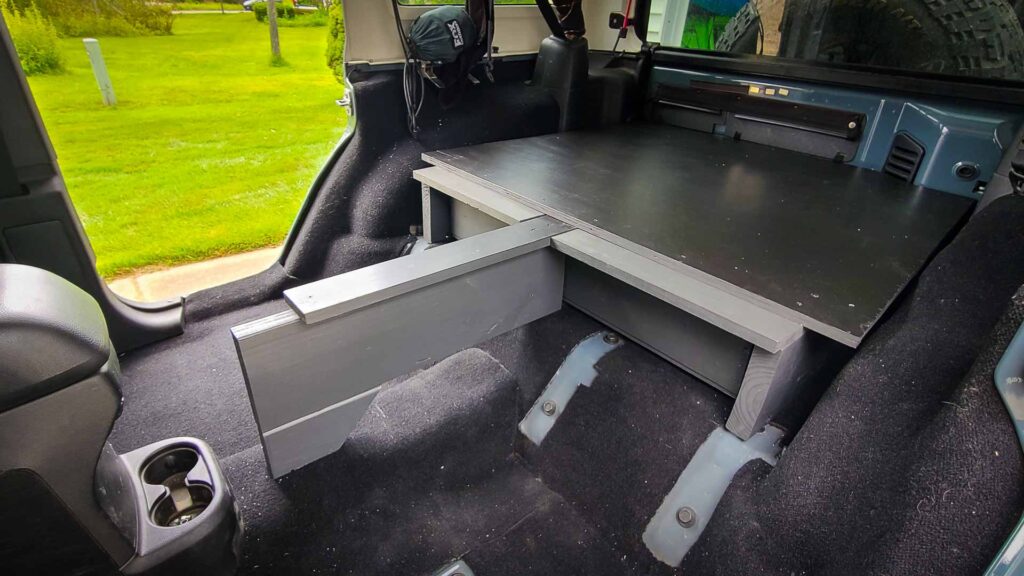 There is so much open storage space because of the minimal spine and support for this Jeep Wrangler bed platform
Step 6. Confirm measures for the 2″x8″ main spine support pieces that go over the body floor articulations. Note in the image below that the main 2″x8″ sits on the frame in the back, and it only needs the small supplemental foot piece to raise it up to be level. I suggest you wait to cut and assemble this until you get through step 9 below.
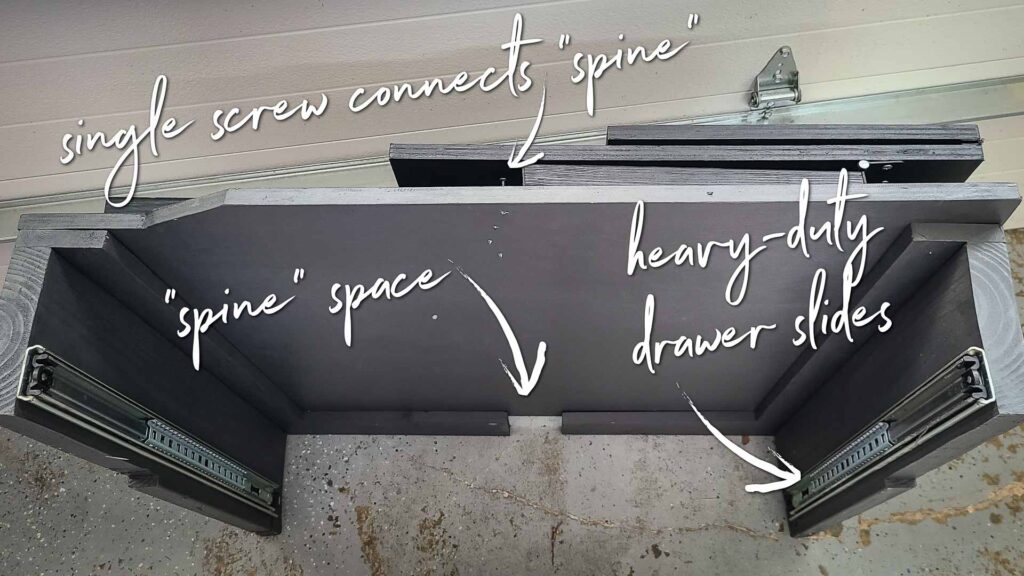 The finished, painted structure of the back drawer part of the Jeep bed storage platform
 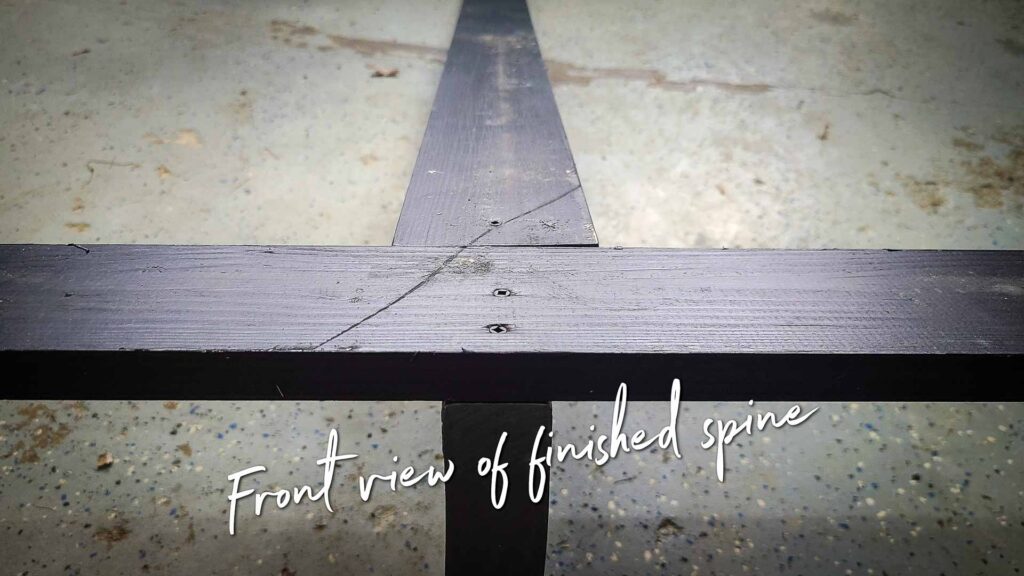 Super simple spine from the front
How-to: Constructing the raised storage platform / drawer enclosure sides
Step 7. Before cutting and constructing the whole spine, cut and sort the 2″x8″ uprights that make the drawer enclosure. This is simple, since the only thing necessary is cutting to length (go longer than shorter if necessary), measuring notches and cutouts, then setting them in.
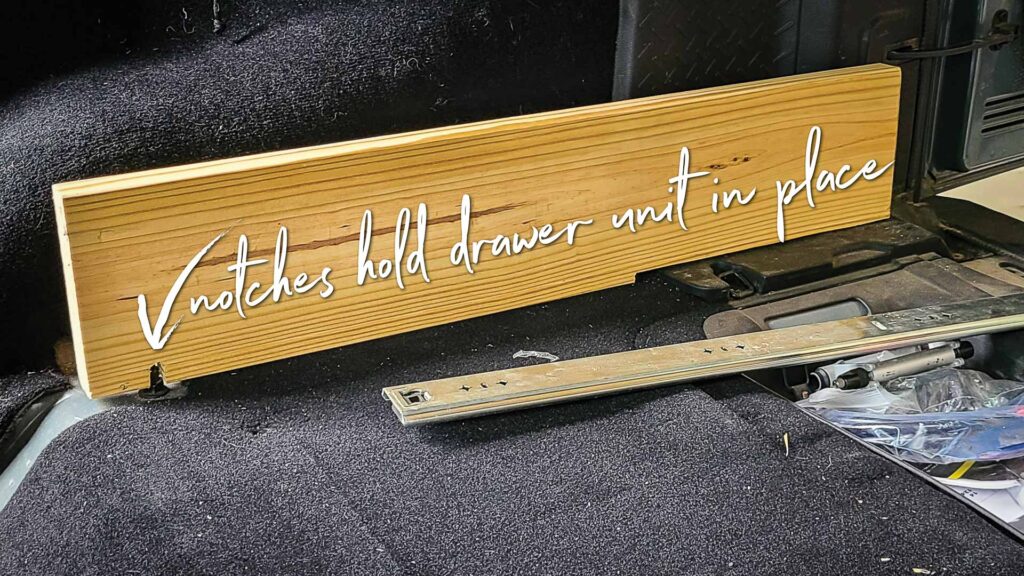 Make you own measures for going around immovable frame bolts or other structure of the Jeep
NOTE: The backmost edge of these uprights are based on the tailgate door latch enclosure. Look close at the plan drawings to see how those things line up!
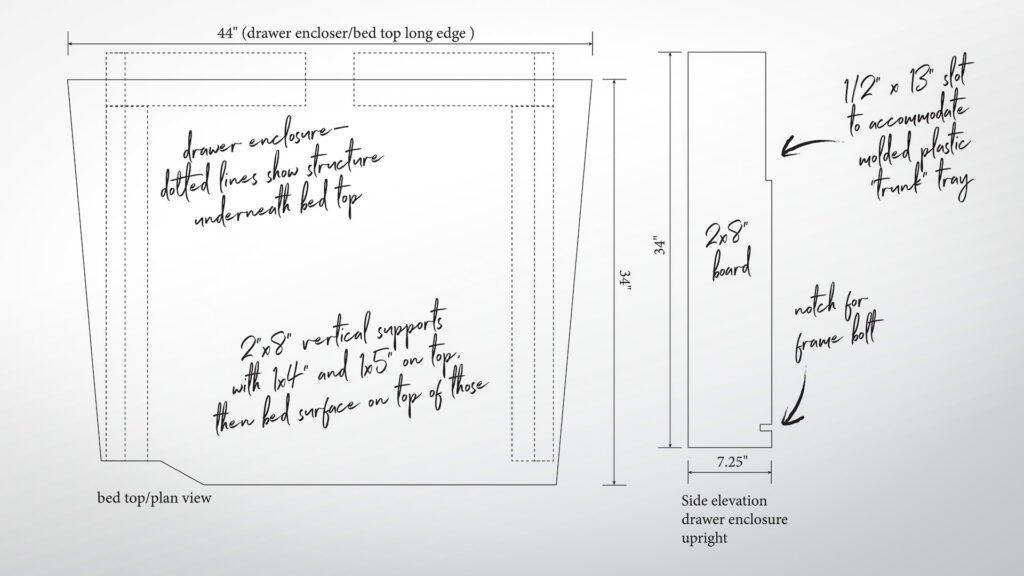 The back drawer details of the Jeep Wrangler JKU bed platform
 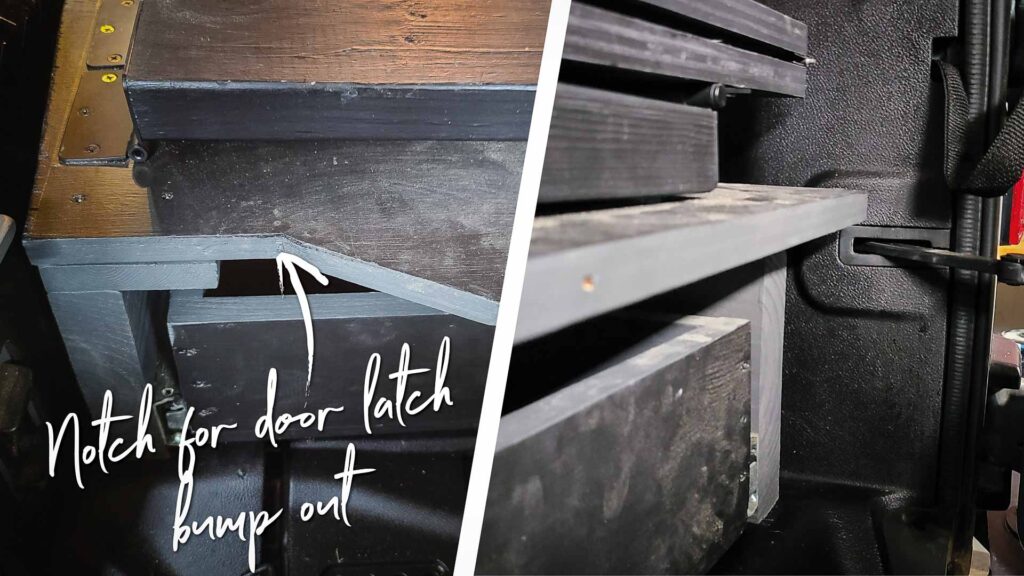 Measure twice, cut once for location and details of latch stub-outs and door closer fur the jeep bed at the back
Step 8. Cut a template for the bed top that goes on the enclosure based on the measure images. Don’t forget that there will be pieces of 1″x4″ on top of the enclosure legs that help to add some surface area for the top and wings to sit on.
At this point, the back of the spine near the tailgate is simply propped up by something (a spare 2″x4″ piece?) so you can see things lining up, test the side locations, etc.
Step 9: Dry set up the central spine, drawer uprights and bed top. This step is really just so that you can really confirm that things are level and your measures are correct before cutting and putting together your spine and the remaining pieces. Make sure the enclosure legs fit night and from front-to-back your drawer has equal room top to bottom.
Now you can likely complete your central spine build and add the 1″x4″ and 1″x6″ top boards to the enclosure verticals. Don’t worry, these get the bed top applied overtop, so if you have to affix then take apart and adjust, it’s not going to be visible.
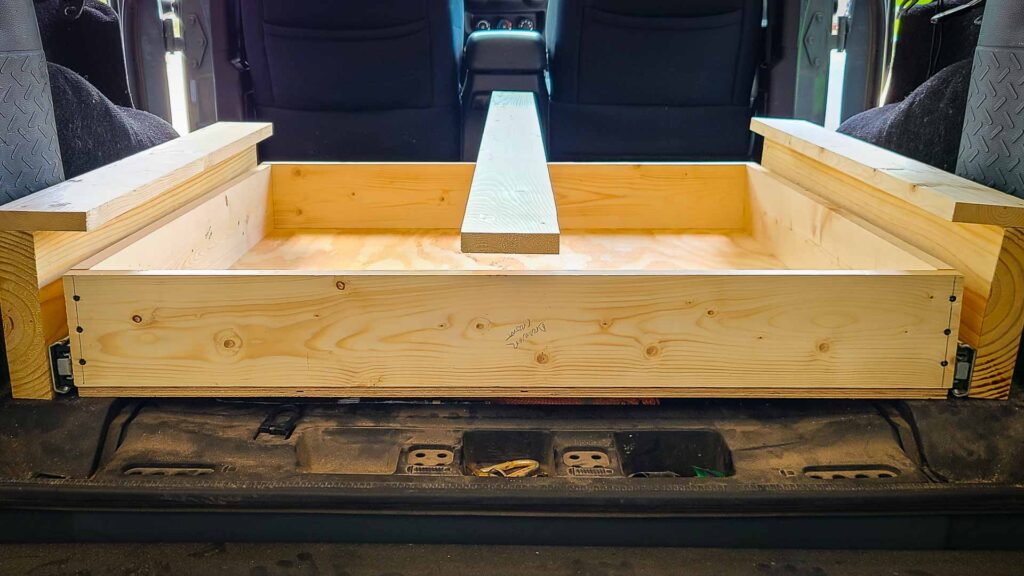 The spine and drawer components of the bed without the top sleeping platform yet, essentially dry-fitting everything multiple times before cutting or assembling
Please visit:
Our Sponsor